
DISCLAIMER!
This guide is provided AS-IS, in the spirit of sharing knowledge!
This gives notice to the following:
DedicatedMC is not responsible nor gives support for the content explained and covered in this guide.
Should you proceed, do so at your own risk.
Tired of using ugly Imgur links? Want to show off your own domain while sharing screenshots? Well you're not alone! Follow this article to find out how! 🚀
Requirements
- A Domain (e.g. example.com)
- A machine that is running a Linux Distro (we recommend to use Debian on a VPS, you don't need a powerful machine)
- ShareX (Windows Only!) https://getsharex.com/
- An
Arecord on your domain pointing to your VPS
Make sure that you have a machine running which can be reached through SSH and that you have full root access to this machine.
Dependencies
To make sure everything is running secure, we recommend that you use a firewall and a Let's Encrypt Certbot for our NGINX webserver to secure it.
# Update our machine
apt-get update
apt-get upgrade

# Install NGINX
apt install nginx -y

# Install Firewall (UFW)
apt install ufw

# Install Certbot
sudo apt-get install software-properties-common
sudo add-apt-repository universe
sudo add-apt-repository ppa:certbot/certbot
sudo apt-get install certbot python3-certbot-nginx
Now that our dependencies are installed, let's setup our NGINX webserver behind our firewall.
Setup
# Start & Enable NGINX
systemctl start nginx
systemctl enable nginx

# Start & Enable UFW
systemctl start ufw
systemctl enable ufw

# Allow Webserver and SSH ports
ufw allow 22
ufw allow 80
ufw allow 443

# Enable UFW Rules
ufw enable
Make sure to allow port 22 in the firewall BEFORE you enable the rules. If you do not do this you will be locked out of your machine!
NGINX is now enabled and our firewall is configured for SSH/Webserver traffic. We can now move onto configuring NGINX for our ShareX image sharing webserver.
Configuring NGINX
Server Block
First, we need to create a folder in which you will store your images. In this example that will be /var/www/i.example.com
To create this folder, run mkdir /var/www/i.example.com . This will create the folder. To check if this worked you can do cd /var/www/i.example.com . If you do not get any errors it is good to go.
We can now configure our NGINX server block. To do this, run the following command: nano /etc/nginx/sites-available/i.example.com and paste the code below.
server {
    listen          80;
    server_name     i.example.com;
    root            /var/www/i.example.com/;
    index           index.php index.html;
}
After pasting in this config and editing it to your needs, hit CTRL X, Y, ENTER. This will save and exit the config.
To enable this server block run the following command:
sudo ln -s /etc/nginx/sites-available/i.example.com /etc/nginx/sites-enabledIn all these examples, make sure to edit i.example.com to the domain you want to use.
After these steps, your NGINX server block will be setup properly and listen on your domain which will point to your ShareX image folder. To secure this connection, we will add a Let's Encrypt SSL Certificate.
Let's Encrypt SSL Certificate
To start Certbot, run the following command: certbot --nginx
If this is the first time you are running Certbot for NGINX, you will be asked some configuration questions. Fill in the required information and continue. When asked for a domain you may skip this step.
Next, you will see the following appear in your console:
Which names would you like to activate HTTPS for?
- - - - - - - - - - - - - - - - - - - - - - - - - - - - - - - - - - - - - - - -
1. i.example.com
Here, select 1as this is the site you want to enable an SSL cert for. When asked for redirection, choose option 2 as this will redirect all HTTP traffic to HTTPS. If you do not receive any errors, you can go to https://i.example.com and you will see that you get a blank NGINX page, with a secure SSL certificate.
If you do not get the above, but instead get a whole bunch of errors in your console, this is likely because your DNS record to point to your VPS hasn't been setup properly yet. In this case you will simply have to wait for the DNS to propagate.
Everything on your machine has now been setup properly and we can now move on to configuring ShareX!
Configuring ShareX
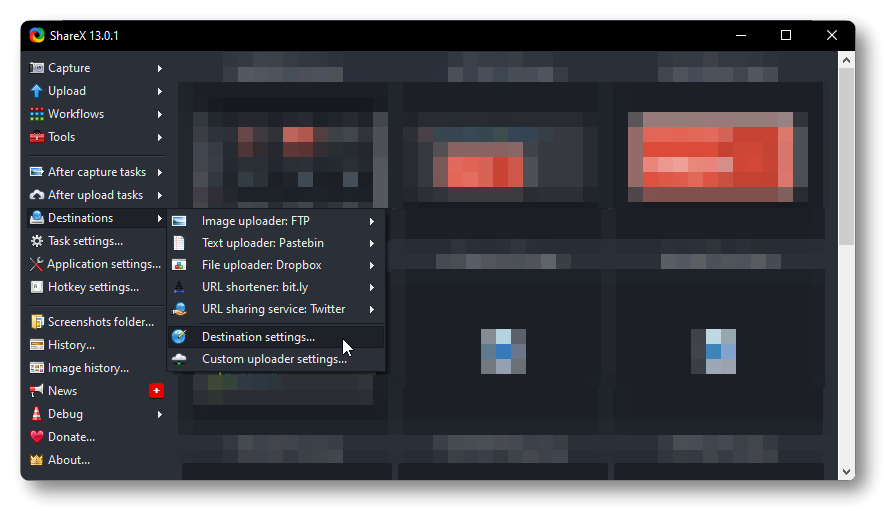
Open ShareX and go to 'Destinations > Destination Settings'
Next, under 'File Uploaders' go to 'FTP / FTPS / SFTP'.
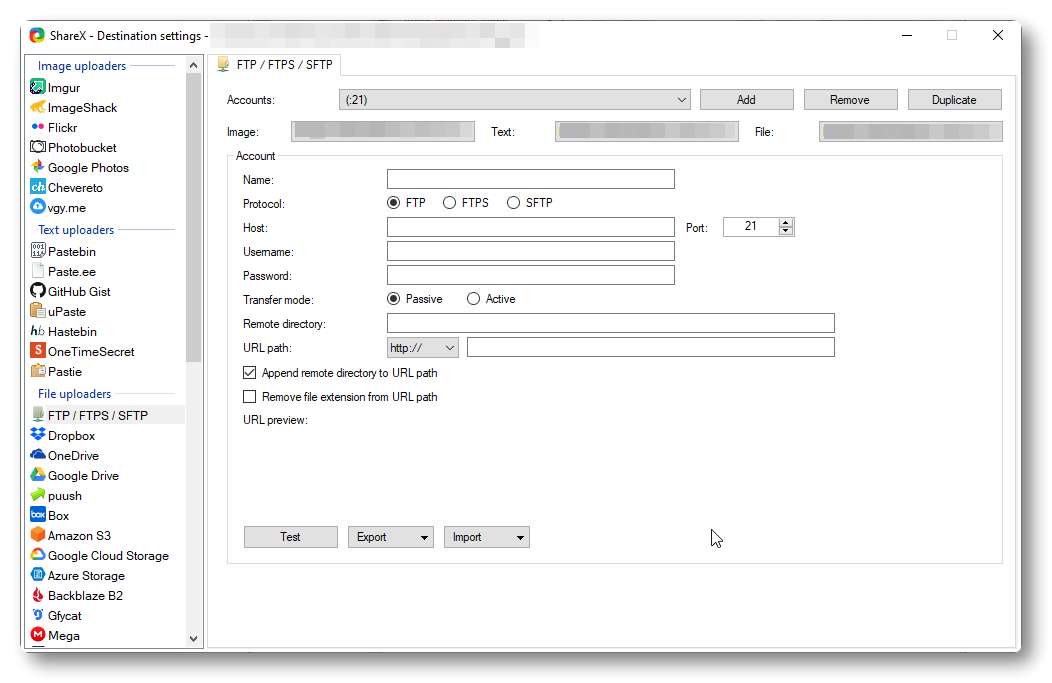
Fill in all your settings and do not forget to set our "i.example.com" config to your own. We recommend that turn off both settings under "URL Path" as this will make your link look more clean. You will also need to fill in your username and password to your Linux Machine here. This will be your SSH login.
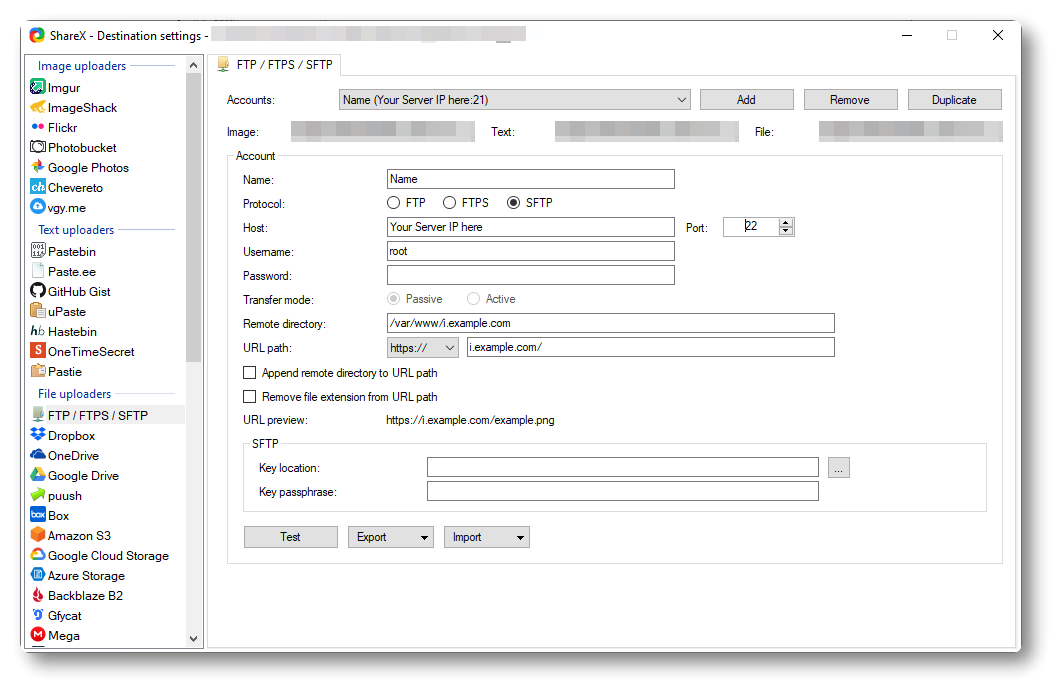
After your configuration has been filled in, and you have edited it to match your own machine/server, hit the "Test" button. You should now get a message saying "Connected!". If not, you will have to troubleshoot where it is going wrong. Generally the issue is that the user you set (root has full access) doesn't have access to the right folder.
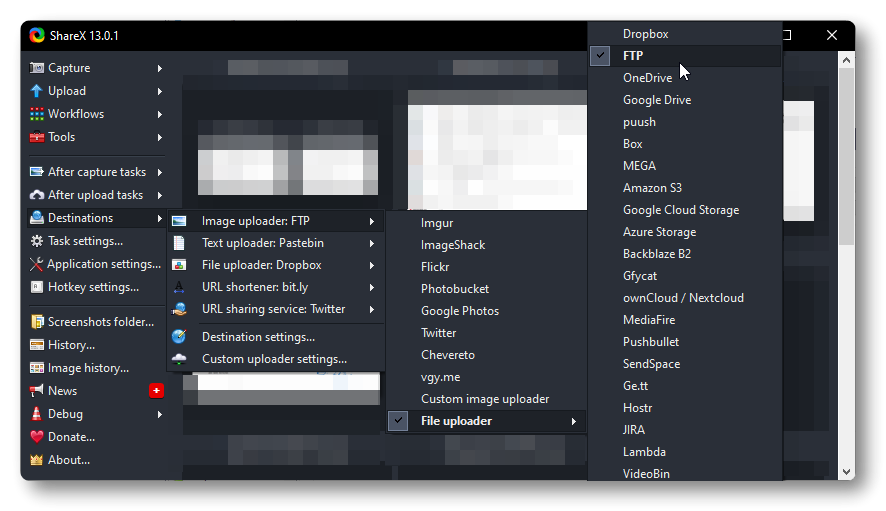
Finally, under "Destinations > Image Uploader: > File Uploader" select the option FTP. This will make sure that your images created will be sent to your SFTP server.
Done! You can now show off with your fancy image links like the one below 🚀
Example: https://i.dedimc.io/BAbd2cqlpk.png