
We partnered with GamerSafer to provide a secure 2FA service for staff two-factor authentication which you can setup in 5 minutes
With so many challenges that Minecraft Servers face, you can prevent one of them from the start by installing the GSAuth for staff 2FA in just a few short minutes. Stop staff account theft and spoofing from hackers by locking staff permissions behind secure identity verification and the GamerSafer smartphone app.
This tutorial will not describe the many customizable options that come with the GSAuth plugin, but will instead focus completely on how to get staff 2FA running on your server as easily as possible. This article assumes you understand how to install and setup a Spigot or Paper powered server and will not cover those steps.
By following this tutorial, all of your staff members can link all of their main and alt Minecraft accounts to their same GamerSafer profile in the app. Signing-up is a one-time process that only takes a few minutes.
Dependencies:
GamerSafer for Minecraft has several required dependencies that you’ll need to have ready before you begin. Here is the list and links to other tutorials to help you get all of the requirements setup before you install the GSAuth plugin.
- The latest version of the GSAuth Plugin (downloads)
- Java 16 or higher (tutorial)
- Paper or Spigot Server for Java 1.16+
- LuckPerms
- MySQL Database (tutorial)
- An open port for the GamerSafer API (tutorial)
Step 1- Get the GSAuth Addon in our Billing Panel
Before you can start installing and using the GamerSafer for Minecraft plugin, you’ll need to receive an API key which will allow you to receive verification when your staff authenticate with the smartphone app.
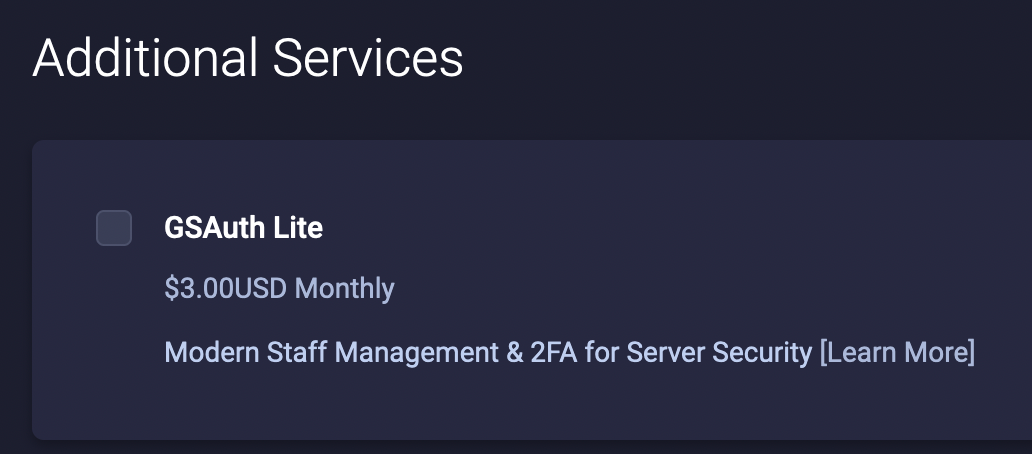
We partnered with GamerSafer to make activating a GSAuth API Key easy through our billing panel. When you sign-up for any of our Minecraft server hosting plans, at the bottom of the Shopping Cart page you will see "Additional Services". Check the box to add the appropriate GSAuth plan to your service, and complete your checkout process.
Once you've purchased your server hosting from us and included the GSAuth addon, you will receive an email about GamerSafer. Within 24 hours you will receive your API Key and activation instructions.
You MUST follow the instructions provided in the email from GamerSafer to finalize the activation of your account.
After your API Key and Guild are activated by following the email sent to you, you can proceed with this tutorial.
Step 2- Download and Install the GSAuth Plugin (and LuckPerms)
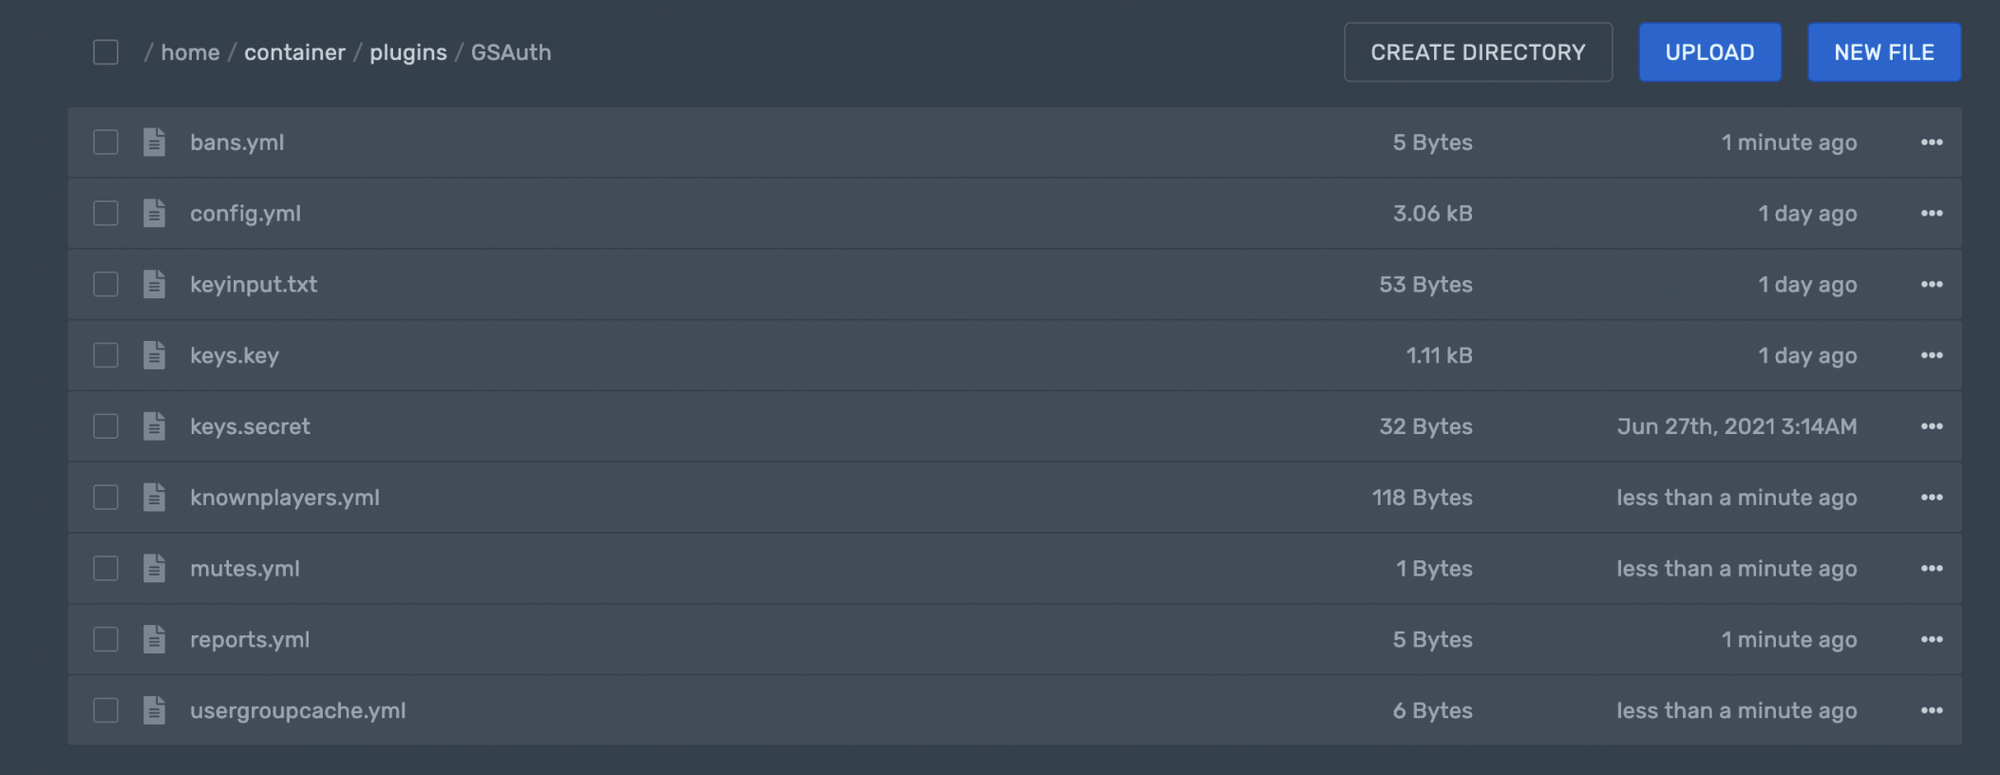
After receiving your API Key and Guild ID from GamerSafer within 24 hours of signup, you can download the GSAuth plugin from here, and install it just as you would any other Spigot or Paper plugin. Start the server once to generate the required files that will be found in the GSAuth folder in your plugins directory.
You can also install the LuckPerms plugin at this time if you have not already done so. Click here for a tutorial.
Note: You may see several errors or notices in your server’s console when you first install the plugin, but this tutorial should clear those up. With the files now generated in your plugins directory, you can stop the server again and move to the next steps.
Step 3- Input your API Key and Guild ID

Locate and open the keyinput.txt file in the GSAuth folder on your server. You will see the two following lines:
- api-key=YOUR_API_KEY_HERE
- guild-id=YOUR_GUILD_ID_HERE
Copy and paste the API Key and Guild ID that provided to you in your GamerSafer welcome email as shown in the screenshot above. Replace “YOUR_API_KEY_HERE” and “YOUR_GUILD_ID_HERE” with the appropriate keys. Then save and close the file.
Note: After you restart the server, this file will be reset as if you hadn’t added your key and ID yet. That’s normal. The key and ID have been encoded and stored elsewhere as an extra layer of protection.
Step 4- Connect your MySQL Database

Locate and open the config.yml file in the GSAuth folder on your server. Near the bottom of this file, you will see the following lines:
- connection-string: jdbc:mysql://localhost:3306/databasename?useSSL=false
- user: mysqluser
- password: mysqlpass
If you have not already created your MySQL database, now is a good time to do that by following our tutorial here.
For “connection-string:”, change “localhost” to the IP address where your MySQL database is located. You can replace “3306” with the port that you are using for the database. Finally, “databasename” should be replaced with the name of an existing database that you previously created where you want to store your GamerSafer data.
You MUST include "?useSSL=false" at the end of your jdbc:mysql connection string AFTER your databasename or the service will not work.
The other two lines, “user:” and “password:” are where you will type your MySQL database username and password so that the plugin can connect.
After you restart the server, the plugin will attempt to generate tables in the database you set where all player UUIDs, bans, mutes, guildMemberIDs, and usernames will be stored.
Step 5- Setup the Authentication Webhook Receiver
In the same config.yml file in the GSAuth folder on your server, you will find the following lines:
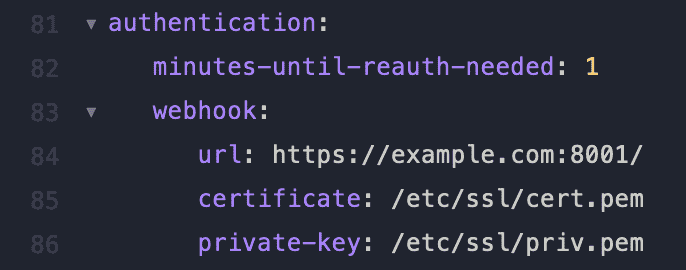
- minutes-until-reauth-needed: 1
- url: https://example.com:8001/
The first of those two lines, “minutes-until-reauth-needed:”, allows you to set how long a staff member’s authentication lasts before it expires. By default this is set to 1 minute, meaning that if the staff log out and log back into the server in less than 1 minute, they will not need to reauthenticate with GamerSafer again. You can set this as high as you’d like, but the lower the number, the more secure.
The second line, “url:”, is where you want the plugin to generate a webserver for receiving the authentications from the GamerSafer service. When a player authenticates using the app, you will receive a push notification to that webserver. The “example.com:8001” should be changed to the IP Address and open port you want the service to use.
Leave "https://" and the "certificate:" and "private-key:" fields as their default values.
If you have not already created an additional port on your server, you can do so from our panel by following the tutorial here.
The GSAuth plugin will attempt to generate this webserver for you automatically. If it is not able to do so, you will see an error in the console when you restart the server. This is likely caused by your IP Address and Port not being configured correctly.
Step 6- Check the GamerSafer “Required” Settings
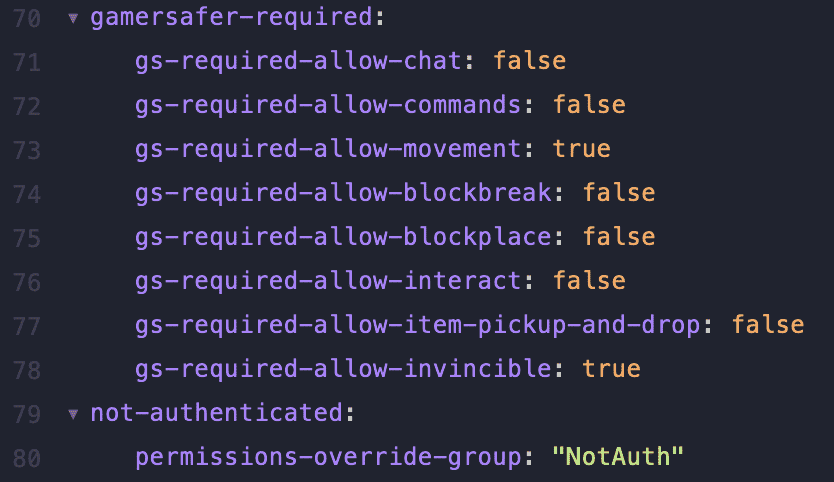
Once again, in the same config.yml file as the previous step, look for the “gamersafer-required:” and “not-authenticated:” lines. These are both used in unique ways for various Minecraft use-cases, but we’ll mostly be focused on “gamersafer-required:” for the staff 2FA goal of this tutorial.
What does “gamersafer-required” mean?
“gamersafer-required:” are the settings that will apply only to specific players (or staff members) that you choose. In Step 7 we’ll learn how to select those users who will be required to authenticate, but in this step we’ll define some of the restrictions that you want all gamersafer-required staff members to have.
Change these settings according to your desires, and when a player logs in who is required to authenticate with GamerSafer the options you enable here will be enforced on their account until they authenticate. You can use this to completely stop those required users from chatting, running commands, block breaking, and more with these options. Once they authenticate with GamerSafer, those restrictions are lifted.
What does “permissions-override-group” mean?
The “not-authenticated:” section is used very differently. For now you can leave this as “NotAuth” or even make it your default usergroup name in LuckPerms.
To put it simply for now, every player that logs in will automatically be added to this “not-authenticated > permissions-override-group” until they authenticate. But it does not force the other “gamersafer-required” restrictions on them. Your players will not be impacted by this if you follow this tutorial and don't change anything else with the settings there.
Step 7- Setup Your LuckPerms Groups
With all of your GamerSafer plugin files edited, you can save the files and restart the server to move into the final setup process of creating the LuckPerms groups that GamerSafer will use. This tutorial assumes you know how to use the “/lp editor” command for LuckPerms. If you don’t, check out their official tutorial here.
The rest of this Step 7 assumes you are keeping your permissions-override-group set to your default LuckPerms group (named "default" on first install of LuckPerms), or have created a group called "NotAuth" with no permissions.
Create a “StaffRequired” group

Specific players you choose will have all other groups and permissions removed except for the gsrequired group you want them in. The moment that they authenticate with GamerSafer, they are removed from the gsrequired group and added back to the original groups and permissions you want them to have.
You can use these different gsrequired groups to allow certain players that you want to force to use GamerSafer for 2FA to still have some permissions before they authenticate. In the example screenshot above, staff members would still have the cmi.command.mail permission, but no other permissions would be accessible to them until they authenticate.
For the sake of this tutorial, we will create one group called “StaffRequired”.
Assign staff to be forced into the “StaffRequired” group on login

Using the example gsrequired group we created before, “StaffRequired”, we can now assign specific users or groups of users to be forced to authenticate by adding the permission “gamersafer.required.staffrequired”.
When a player with that permission logs in, they will have all of their existing groups and permissions removed and they will be forced into the “StaffRequired” group until they authenticate with the app. Once they authenticate, they are removed from the “StaffRequired” group and put back in their normal permissions and groups.
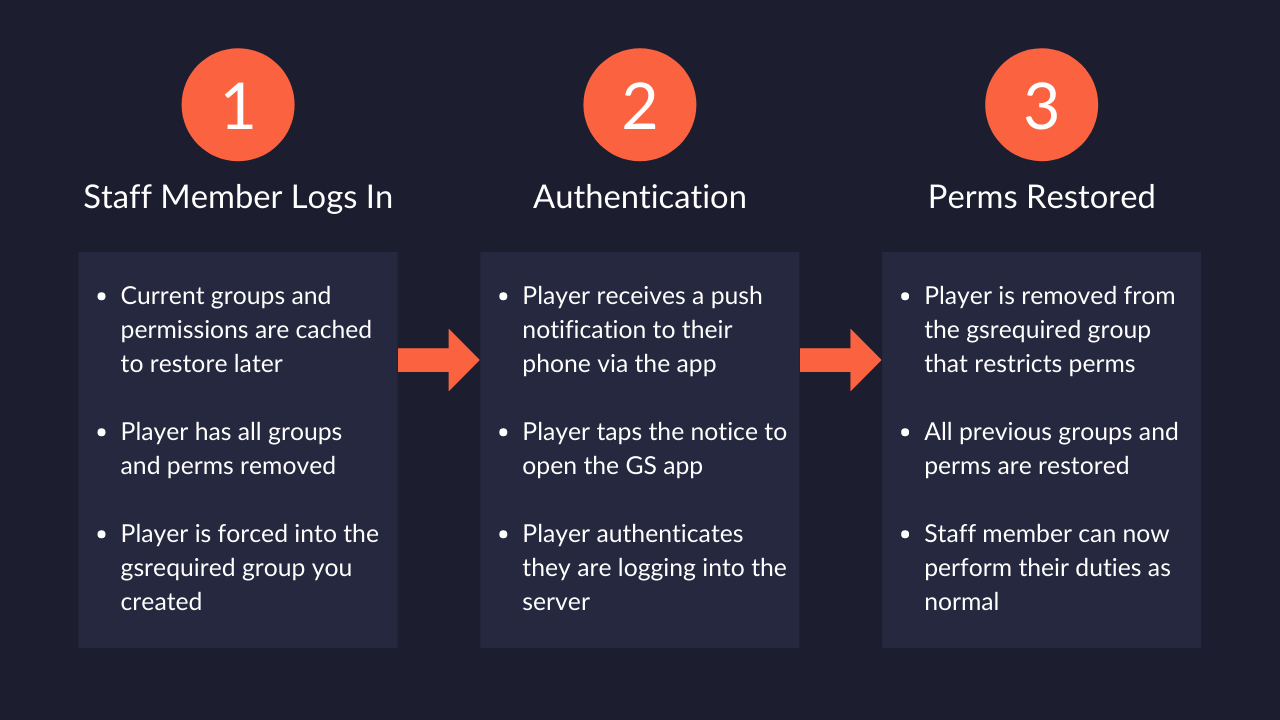
In this example, all members of the “Staff” group will have the “gamersafer.required.staffrequired” permission. This means that when they login they’ll be forced out of the “Staff” group and into the “StaffRequired” group. Once they authenticate with GamerSafer, they will be removed from the “StaffRequired” group and added back to the “Staff” group so that they can get all of their normal staff permissions.
In the event that your server crashes or restarts while a staff member is in one of the gsrequired groups, their other groups are cached and will be restored the next time they log in and authenticate.
Step 8- Celebrate Your New 2FA Setup!
You are now done! With all of these settings in place you can save LuckPerms and restart the server. From this point on your staff will be required to use GamerSafer for verified 2FA before being granted any potentially dangerous permissions.
All that’s left now is for your staff team members (who have the gsrequired permission) to join your GamerSafer Guild by scanning the QR code that appears in-game on your server using the GamerSafer app.
When they scan that QR code to accept the invite, their GamerSafer profile will be linked to your server and every time they log into your server with their main or alt Minecraft accounts they’ll receive a push notification to their phone asking them to authenticate again.
2FA protects your staff accounts from being hacked on your server, protects your players from downtime, and protects you from headaches caused by these harms.