
In this article we will show you how to change the rich preview banner of the link of your Dynmap.
General Information
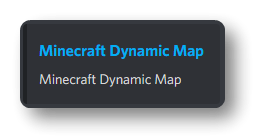
In this article we will show you how to change the Rich Preview Banner from this:
To this:

How to customize the Dynmap Rich Preview banner
Step 1: Go to the Raw Power Panel, select your server and go to 'File Management'. Next, open the folders /home/container/plugins/dynmap/web.
Step 2: In the /web folder, open the index.html file.
Step 3: This file includes all the basic HTML information about Dynmap. You can customize this file however you choose, in this article we are only going to change the Rich Preview banner
Make sure you don't change anything other than what is stated below, as it might break your Dynmap!
Step 4: To start, we can change the title and description of your rich preview. To change the title, replace Minecraft Dynmap Map in this line to anything you want.
<title>Minecraft Dynamic Map</title>In this example we have changed it to match the example image above.
<title>DedicatedMC.io Dynmap Tutorial</title>Step 5: Next, we can change the description. To change this, replace "Minecraft Dynamic Map" in the following line to anything you want.
<meta name="description" content="Minecraft Dynamic Map"/>In this example we have changed it to match the example image above.
<meta name="description" content="Test Dynmap for Tutorial"/>Step 6: Sweet! Your Title and Description are now changed. If needed you can also change the keywords in the line above the description. These words are words that will be used to find your map easily. As an example, you can include your server name in here. This will show your Dynmap when Googling for your servers name!
Step 7: As you can see in the example image above, we have changed the banner on the left of the rich preview to blue. Next to this, the browser bar on mobile will also be changed with the following two lines of code. These lines may be placed under the following line:
<meta name="apple-mobile-web-app-status-bar-style" content="black-translucent"/>To add these colors, add the following two lines:
<meta name="theme-color" content="#1da1f2" /><meta name="msapplication-TileColor" content="#1da1f2" />In this example we have used the HEX code #1da1f2 but using this Google Tool, you can choose any HEX color code you want! Simply replace #1da1f2 in the lines of code to a color you want.
Step 8: When done editing, save the index.html file and restart your server. As this Rich Preview Banner can take a while to update due to caching, you might not see the changes immediately. Generally, this can take between 10-30 minutes to update. If you don't see your changes immediately, you know why. Just be patient, it will change over time!
Done! You are now using your own customised Rich Preview Banner.