
This guide will show you how to get started with your Minecraft server using the DedicatedMC.io Panel and grow your player base.
How to Join Your Server
Step 1: First, you’ll need to go to the DedicatedMC.io Panel and navigate to your server list to view which server you would like to join.

Step 2: In the server list, choose the server you would like to join in Minecraft, and copy the Connection IP into Minecraft!
If you ordered a server that has a Dedicated IP, you do not need to write 25565 as the port. If you do not have a Dedicated IP, you must include the Port in your Server Address. (Ex. 195.201.165.116:25585)
Step 3: Click Done and the server is now added to your multiplayer server list!
Done!
How to Whitelist Yourself
Step 1: First, you’ll need to go to the DedicatedMC.io Panel and select the server you wish to whitelist yourself on.
Step 2: After selecting the server, make sure you are in the console and then type the following commands:
whitelist add <playername> (Replace <playername> with your Minecraft in-game name.)
Step 3: Enable your whitelist to be enforced! Type whitelist on to enable the whitelist on your server.
Done!
How to OP Yourself
Step 1: First, you’ll need to go to the DedicatedMC.io Panel and select the server you wish to make yourself operator on.
Step 2: After selecting the server, make sure you are in the console and then type the following commands:
op <playername> (Replace <playername> with your Minecraft in-game name.)
Done!
How to Access server.properties
Step 1: First, you’ll need to go to the DedicatedMC.io Panel and select the server of which you view the server.properties on.
Step 2: In the selected server, either go to ‘File Management’ or use your choice for SFTP. A guide on how to use SFTP can be found here.
Step 3: When using the File Manager on the Panel or SFTP, navigate inside the /home/container folder. (This is the main folder where your server jar file and world folders are located.)

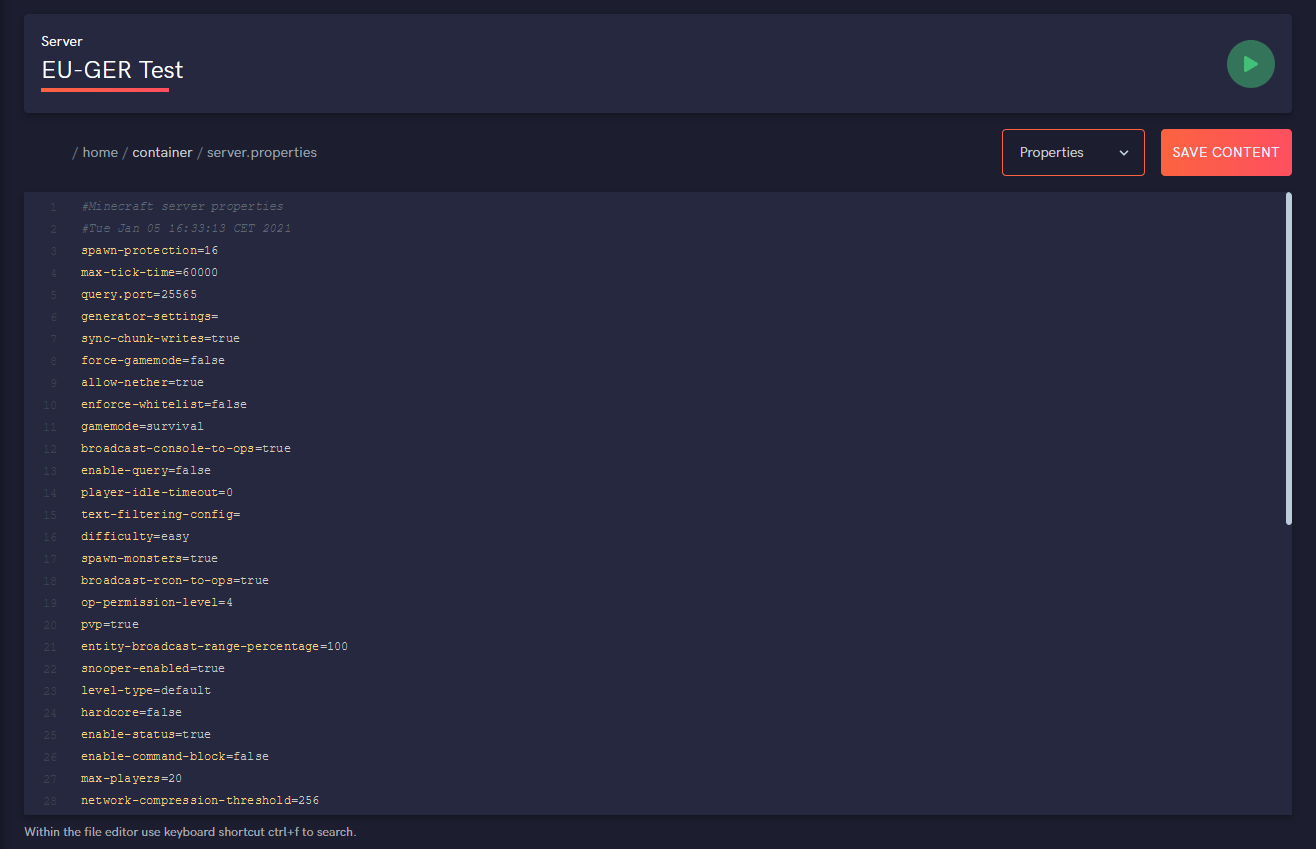
Step 4: In your File Manager, scroll until you see the file named server.properties. Then, click to start editing the file.

The server.properties file can be used to set resource packs, allow flight, enable command blocks, toggle PvP, and much more! View our in-depth guide on customizing server.properties below!
Step 6: If you make changes to the File, be sure to click Save Content before exiting!
Done!
Interested in installing plugins? Check out our guide on how to install plugins here! We recommend using Essentials, WorldEdit, WorldGuard, and Multiverse Core if you are starting off your server.
Customizing server.properties
Here's how to customize your server.properties for your Minecraft server using the DedicatedMC.io Panel.
Step 1: First, you’ll need to go to the DedicatedMC.io Panel and select your desired server.
Step 2: In the selected server, either go to ‘File Management’ or use your choice for SFTP. A guide on how to use SFTP can be found here.
Step 3: When using the File Manager on the Panel or SFTP, navigate inside the /home/container folder. (This is the main folder where your server jar file, and world folders are located.)

Step 4: In your File Manager, scroll until you see the file named server.properties and then click to start editing.

Most Commonly Changed Properties:
pvp Set to true to enable PVP | Set to false to disable PVP
level-name Set this to the main world folder name on your server.
resource-pack Set this to a resource pack direct download link.
view-distance Set this to the amount of chunks you want the server to load on a player's client.
Want more information on what every key does in your server.properties file? Click here to view our document explaining all the keys.
Done!
This article was created by a member of our community. Join our Discord to do the same!