
In this guide, we will be detailing how to install Voice Chat into your Minecraft server. But as a preface, this will be a generalized installation guide for Forge, Fabric and Paper.
Different variations of Voice Chat mods/plugins exist, so consult their documentation for any specific questions or config options. Our mod/plugin of choice for this guide will be Simple Voice Chat by henkelmax.
Forge/Fabric
- If you have just installed Forge and haven't booted your server up yet, do so before continuing with this guide. You will need the files it generates. For our Forge installation guide, see HERE.
2. Open your mods folder in your File Management tab, and click the orange Upload button. It will open a window which will allow you to select local files on your computer to upload. Find the .jar file of the Voice Chat mod, click it, and hit open. After it finishes uploading, reboot your server.

MAKE SURE THE FILE YOU UPLOADED IS CORRESPONDING TO YOUR MINECRAFT VERSION! IF YOU UPLOADED AN OLDER/NEWER VERSION THEN YOU HAVE INSTALLED, THE MOD WILL CAUSE THE SERVER TO CRASH.
3. Once Voice Chat has been installed, it is time to configure it. Voice Chat will automatically launch on port 24454, but since that port isn't opened, we will open a new one for Voice Chat to listen to.

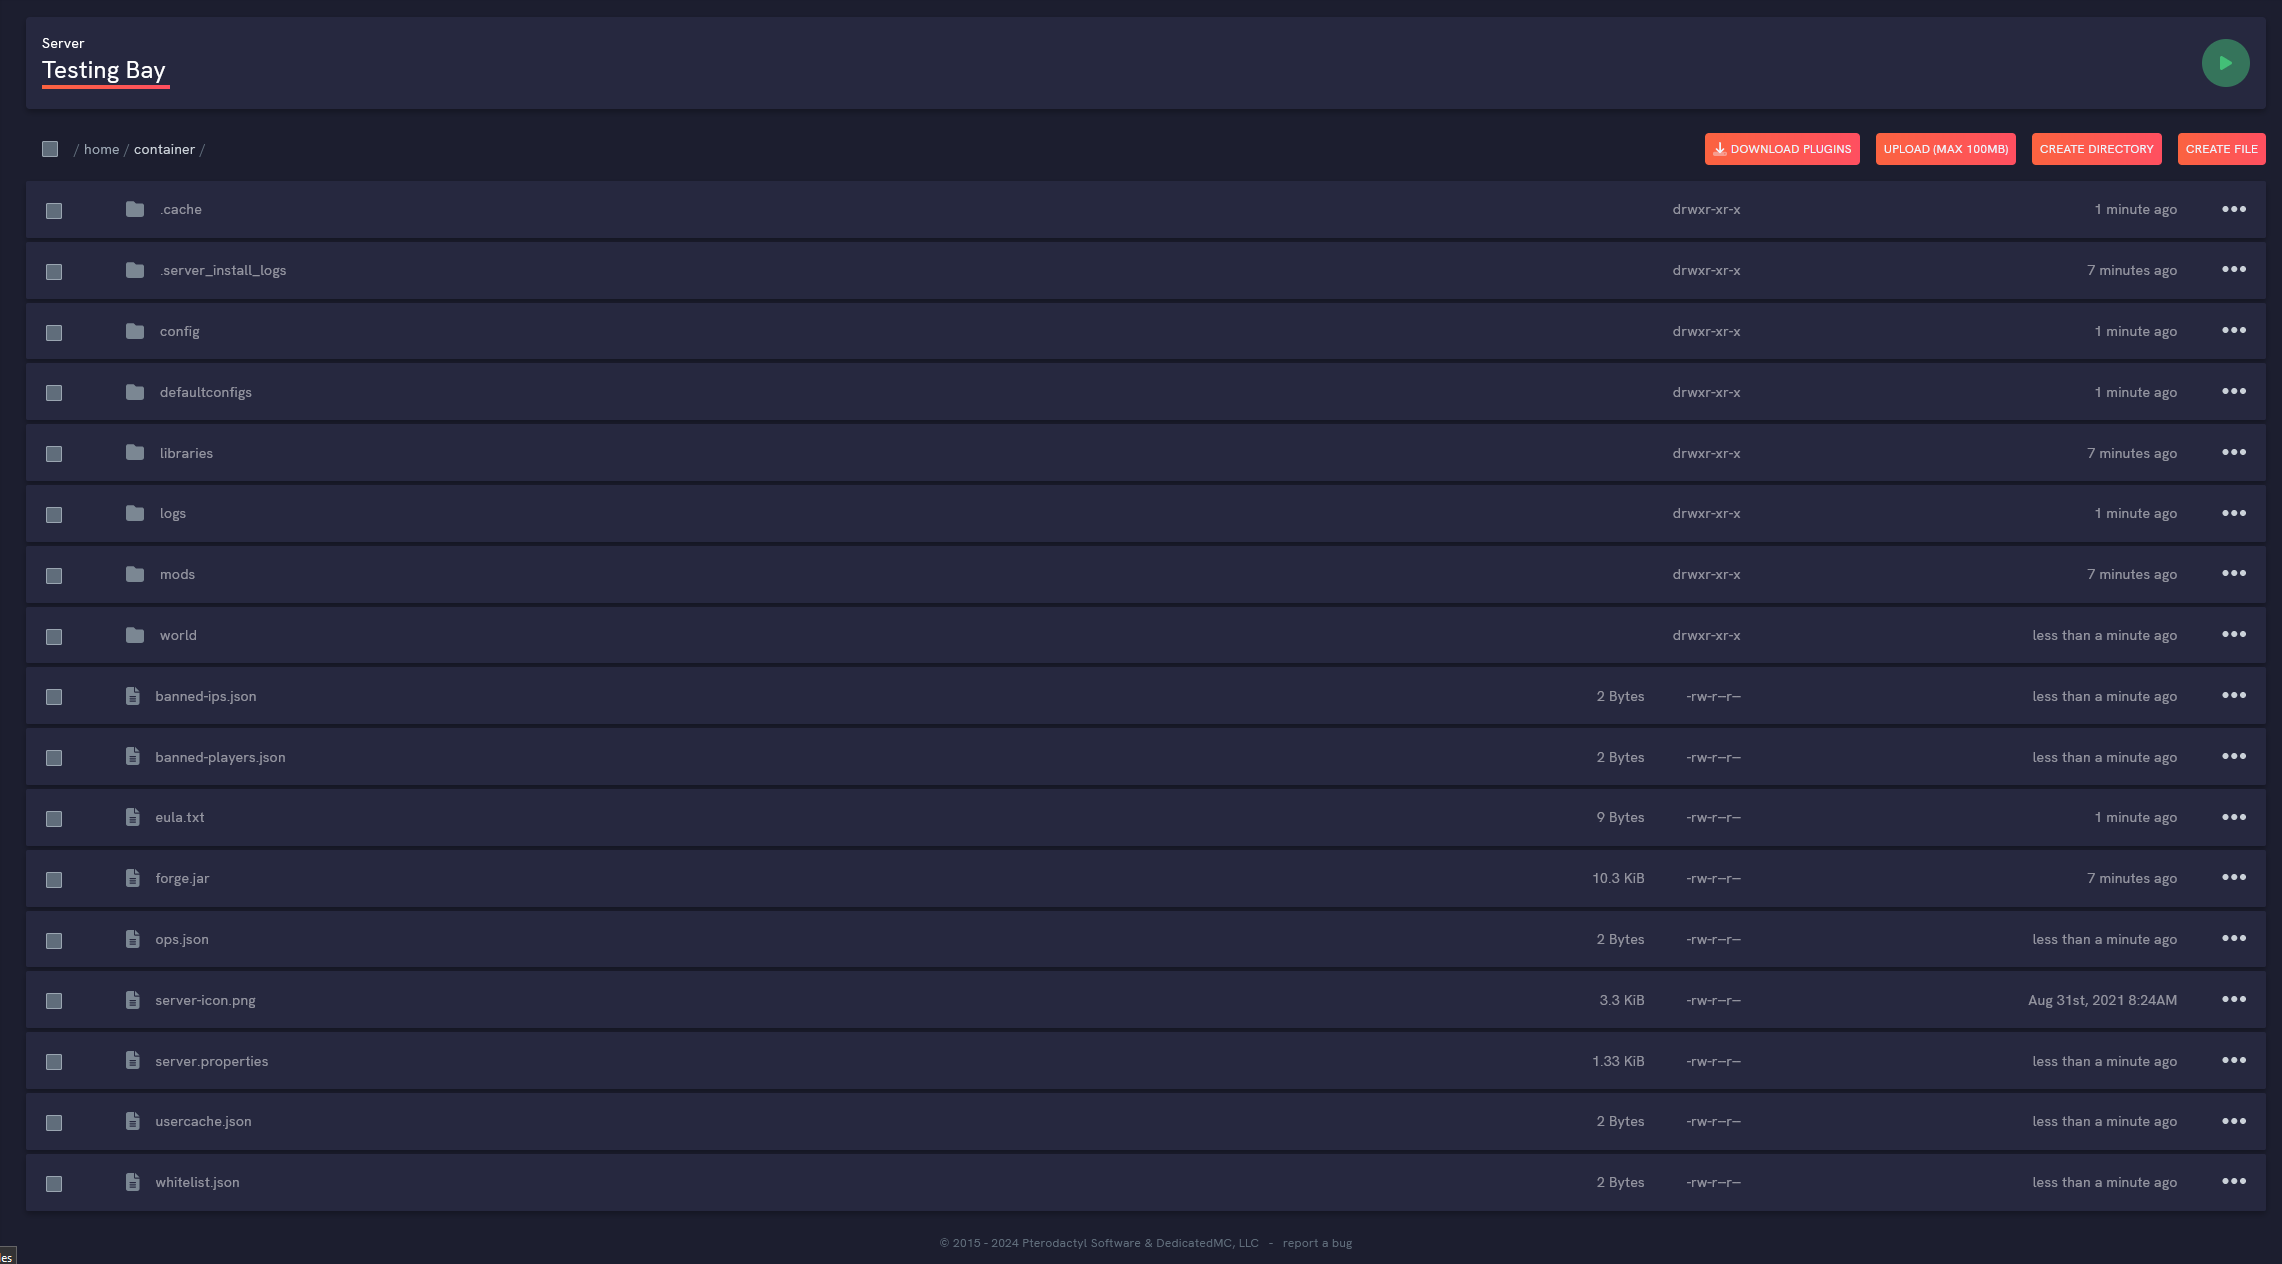
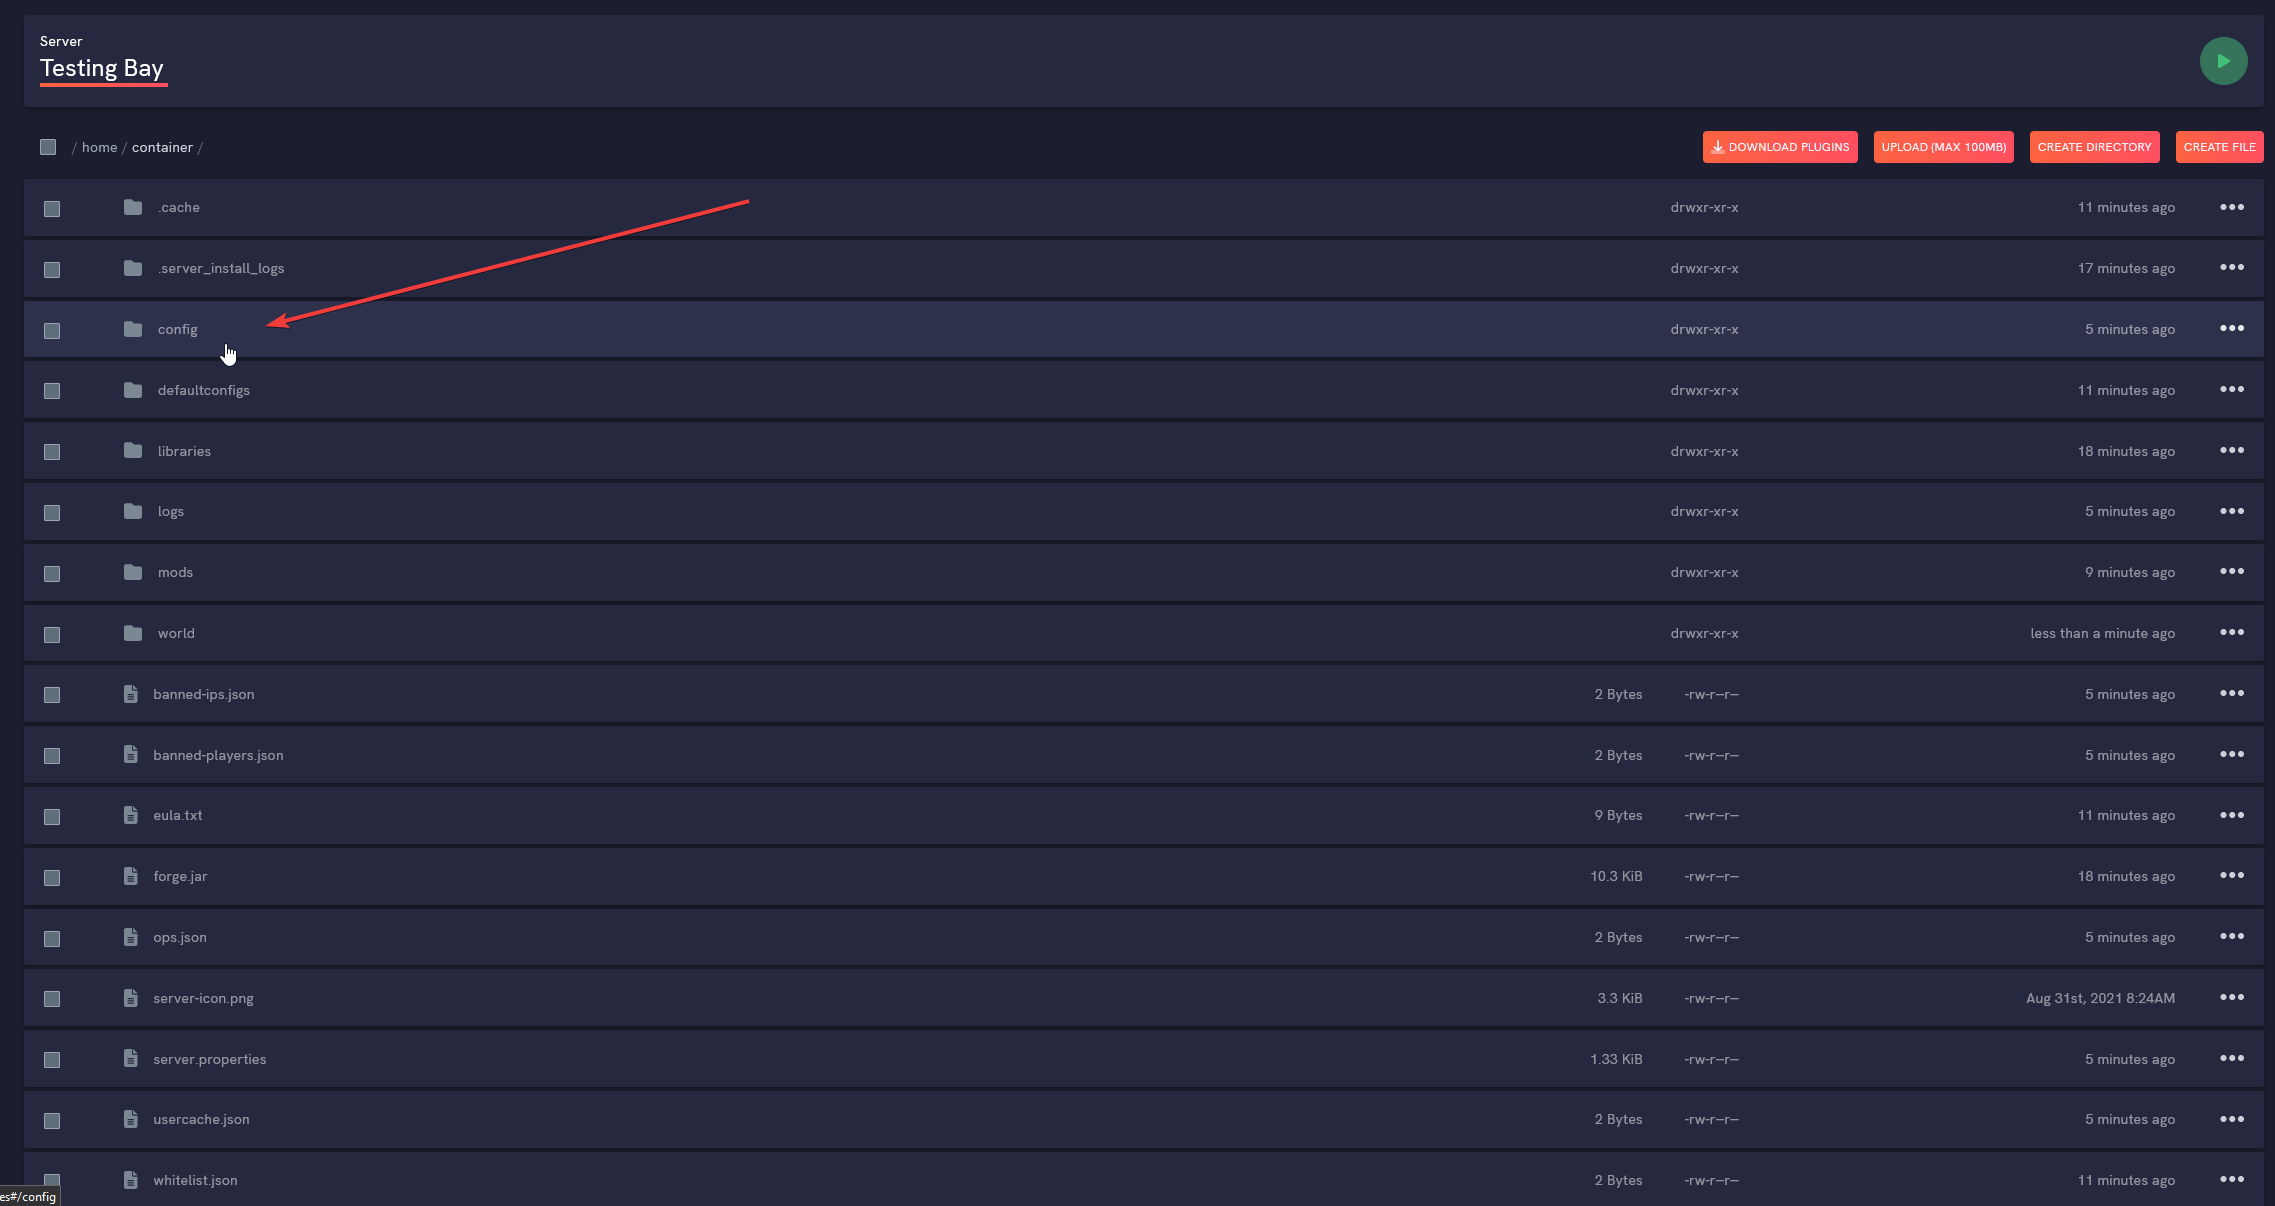
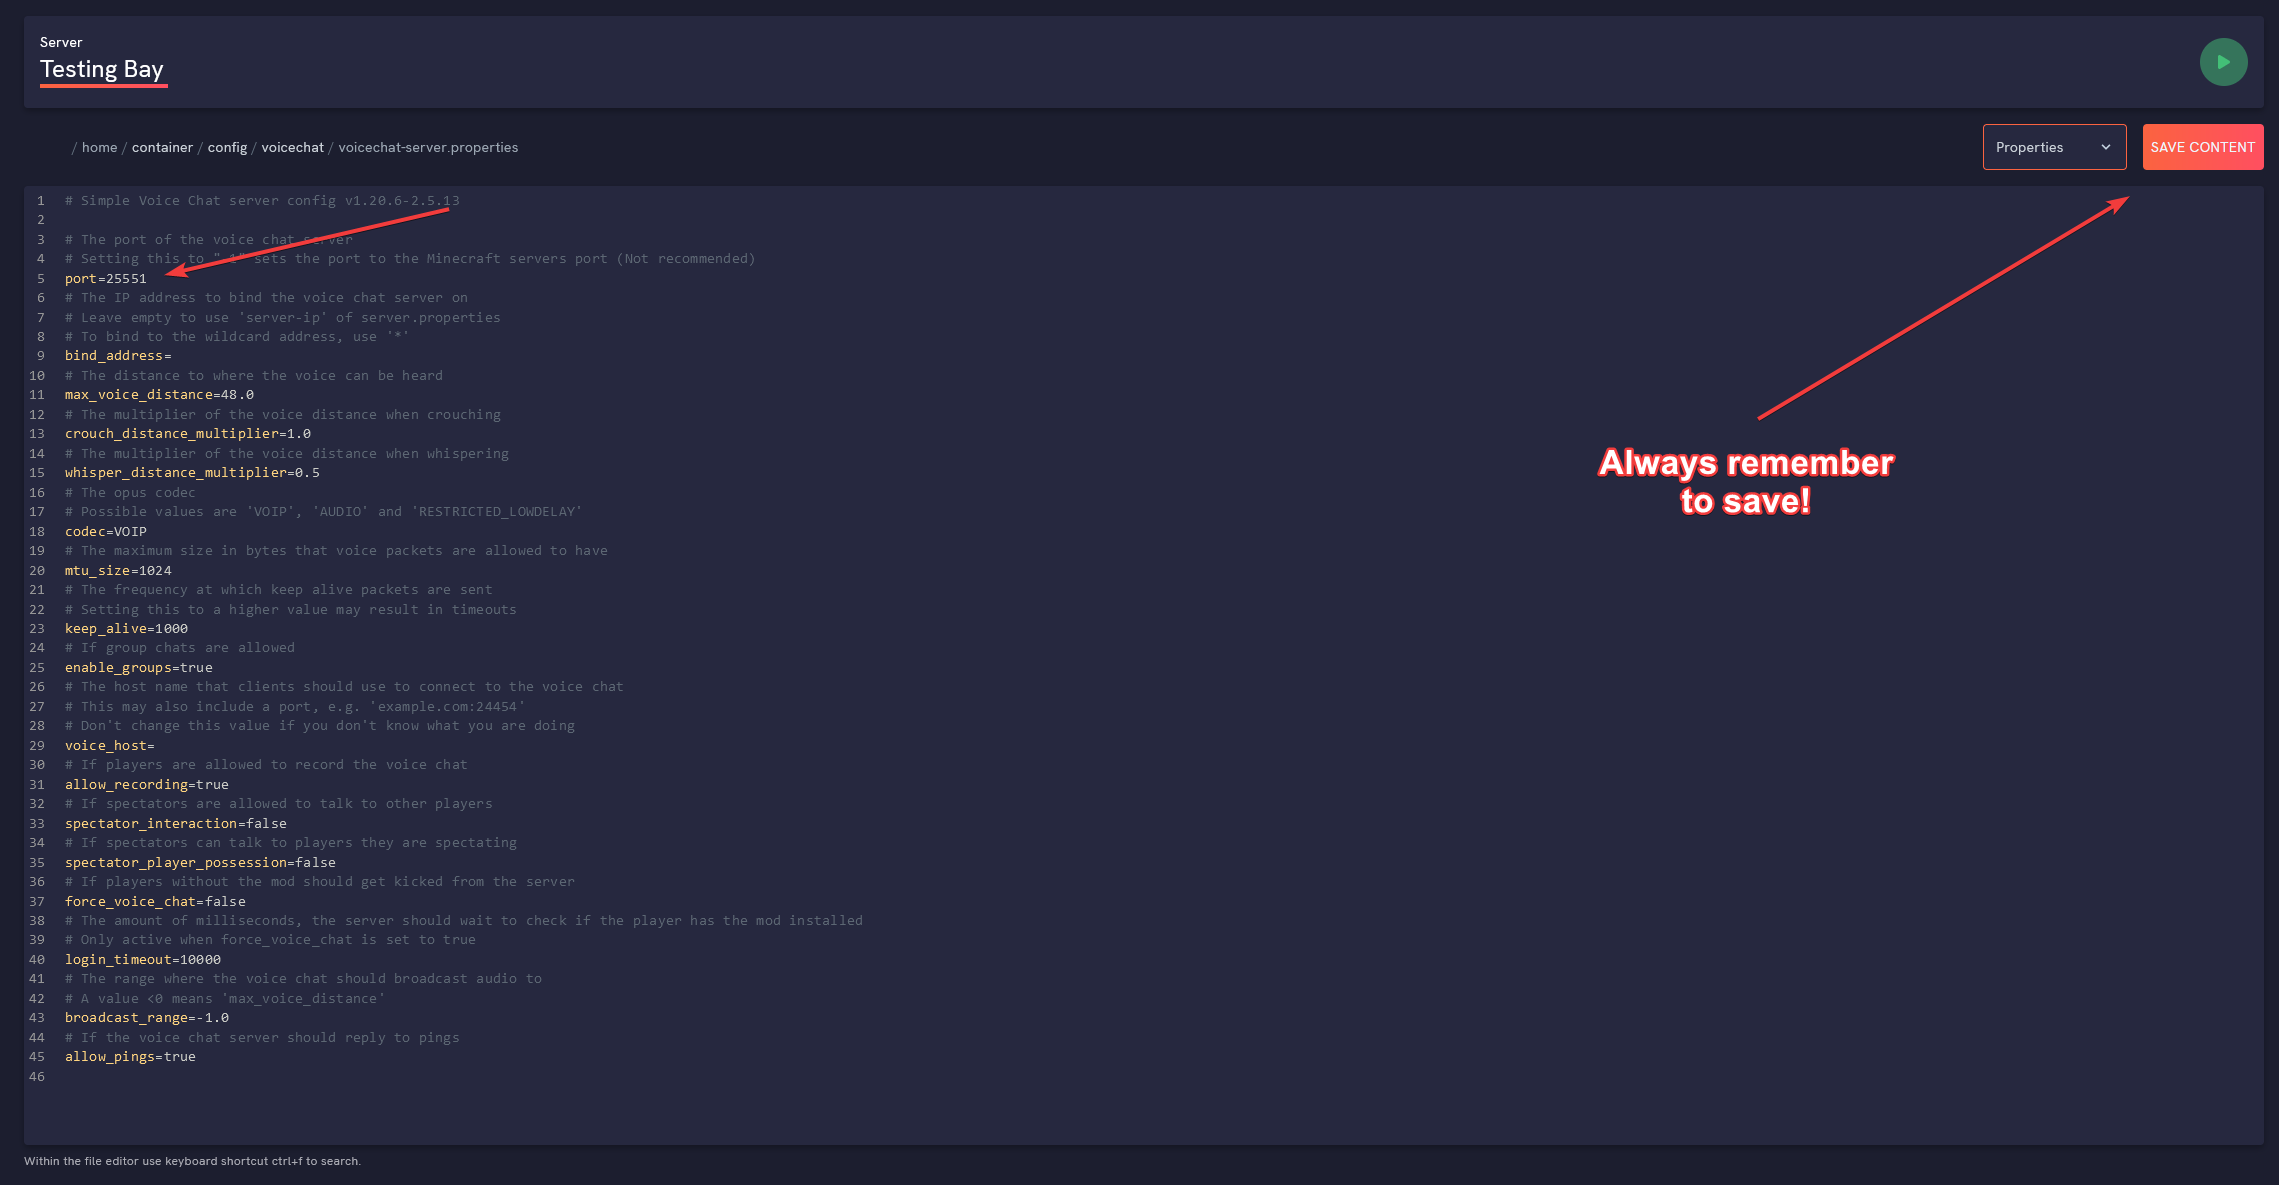
4. Open your File Management and find your /config folder. Within it, open your voicechat folder, and finally the voicechat-server.properties file.

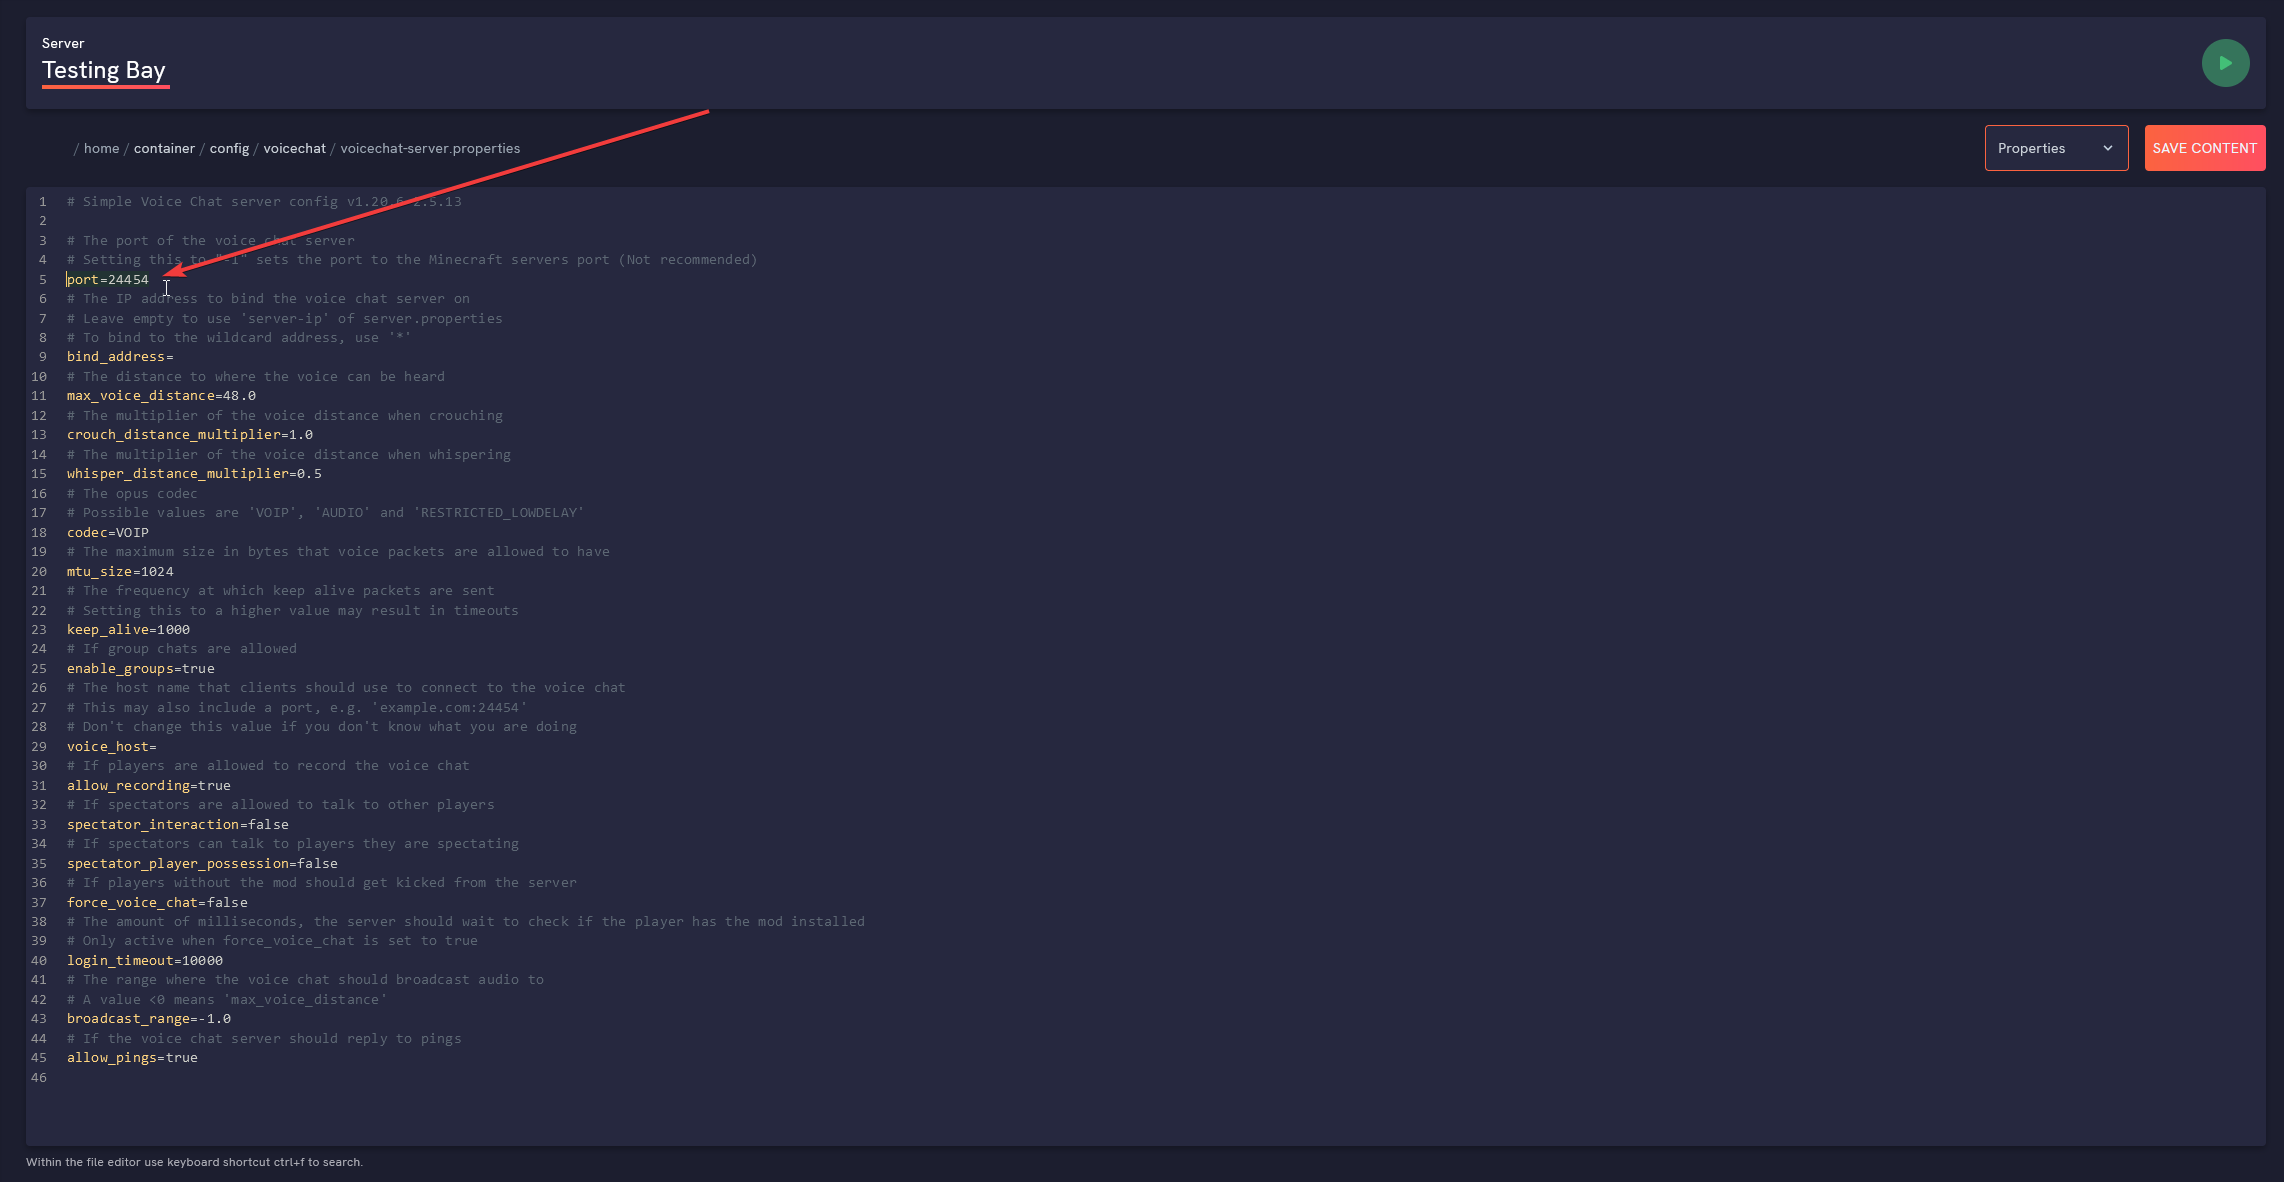
5. After opening the properties file, you are looking for the port option to edit.
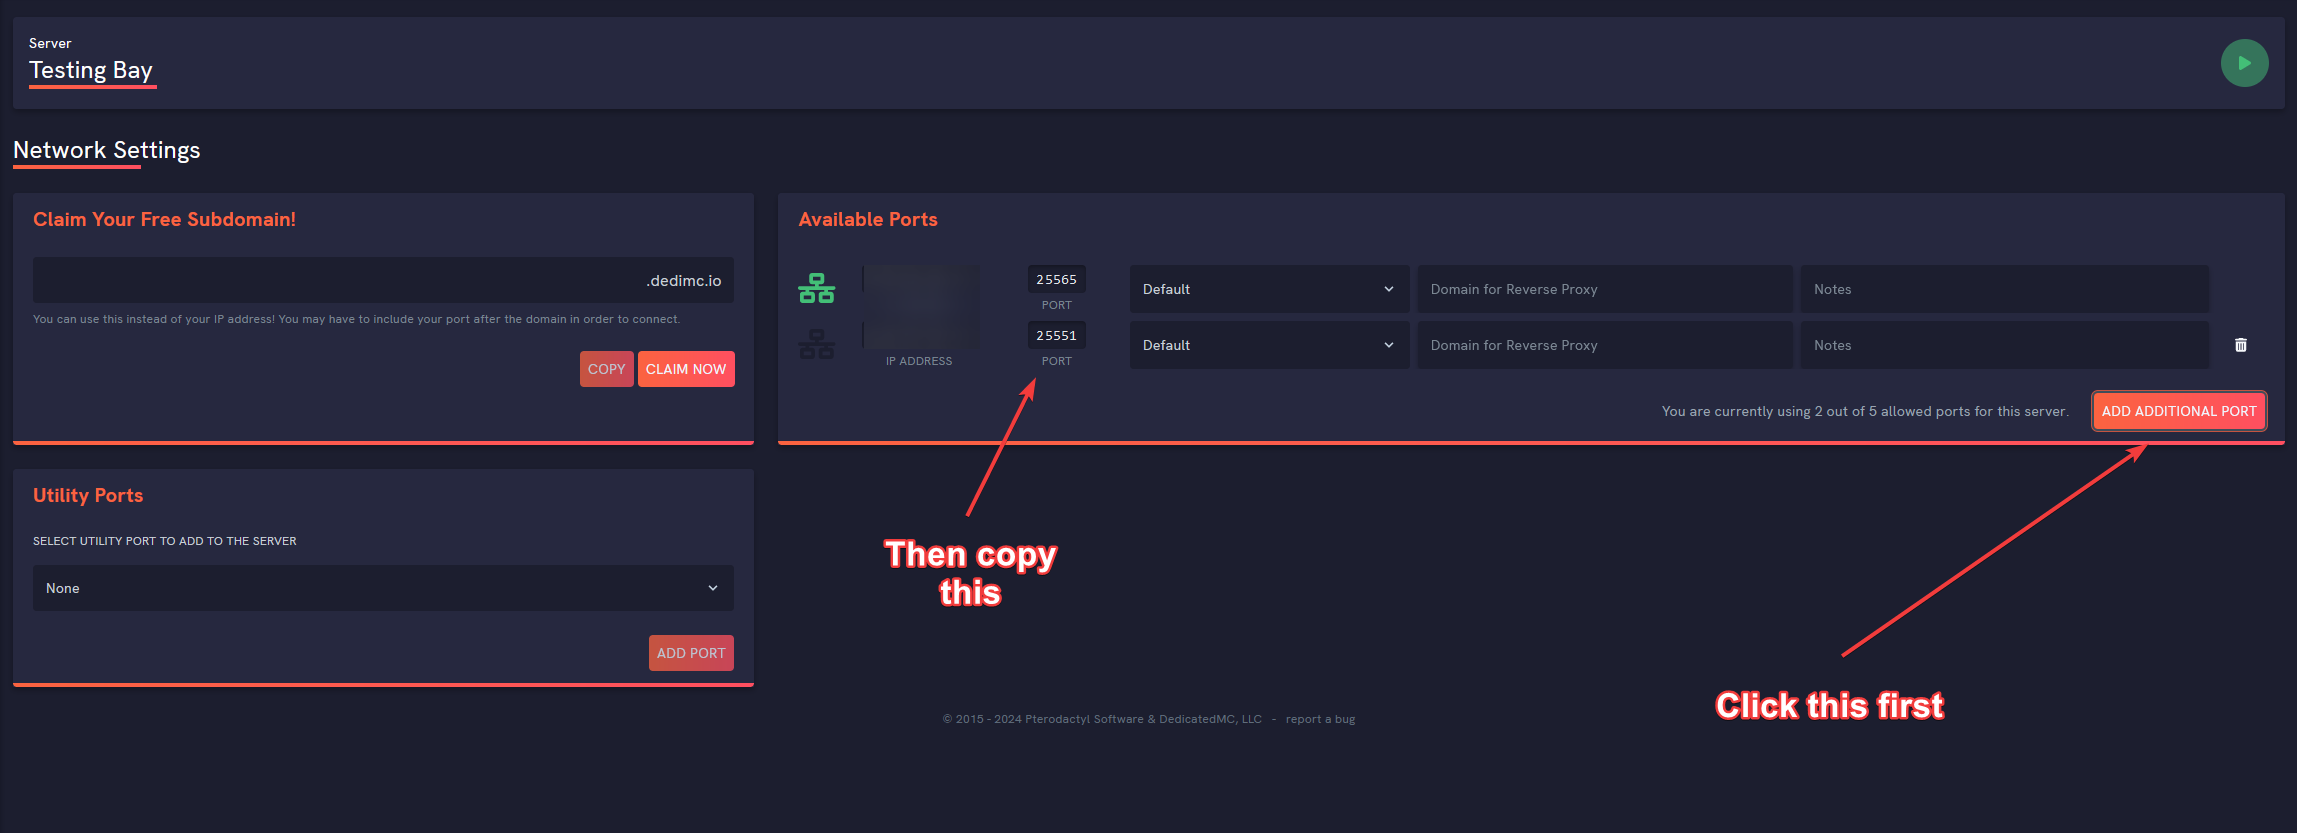
6. Since port 24454 is not open, we will need to open a new one. Leave this page open, and head to your Network Settings tab of your Raw Power Panel.
7. Once you have the Network Settings page open, on the right side of your screen, there will be an Add Additional Port orange button. Go ahead and click it, and copy the port that it opens.
8. Navigate back to your properties file you previously opened, and paste the new port and replace 24454.
9. Head back to your console, and hit "Restart". If you've done all the steps correctly, your newly opened port should be displayed after the boot cycle completes.
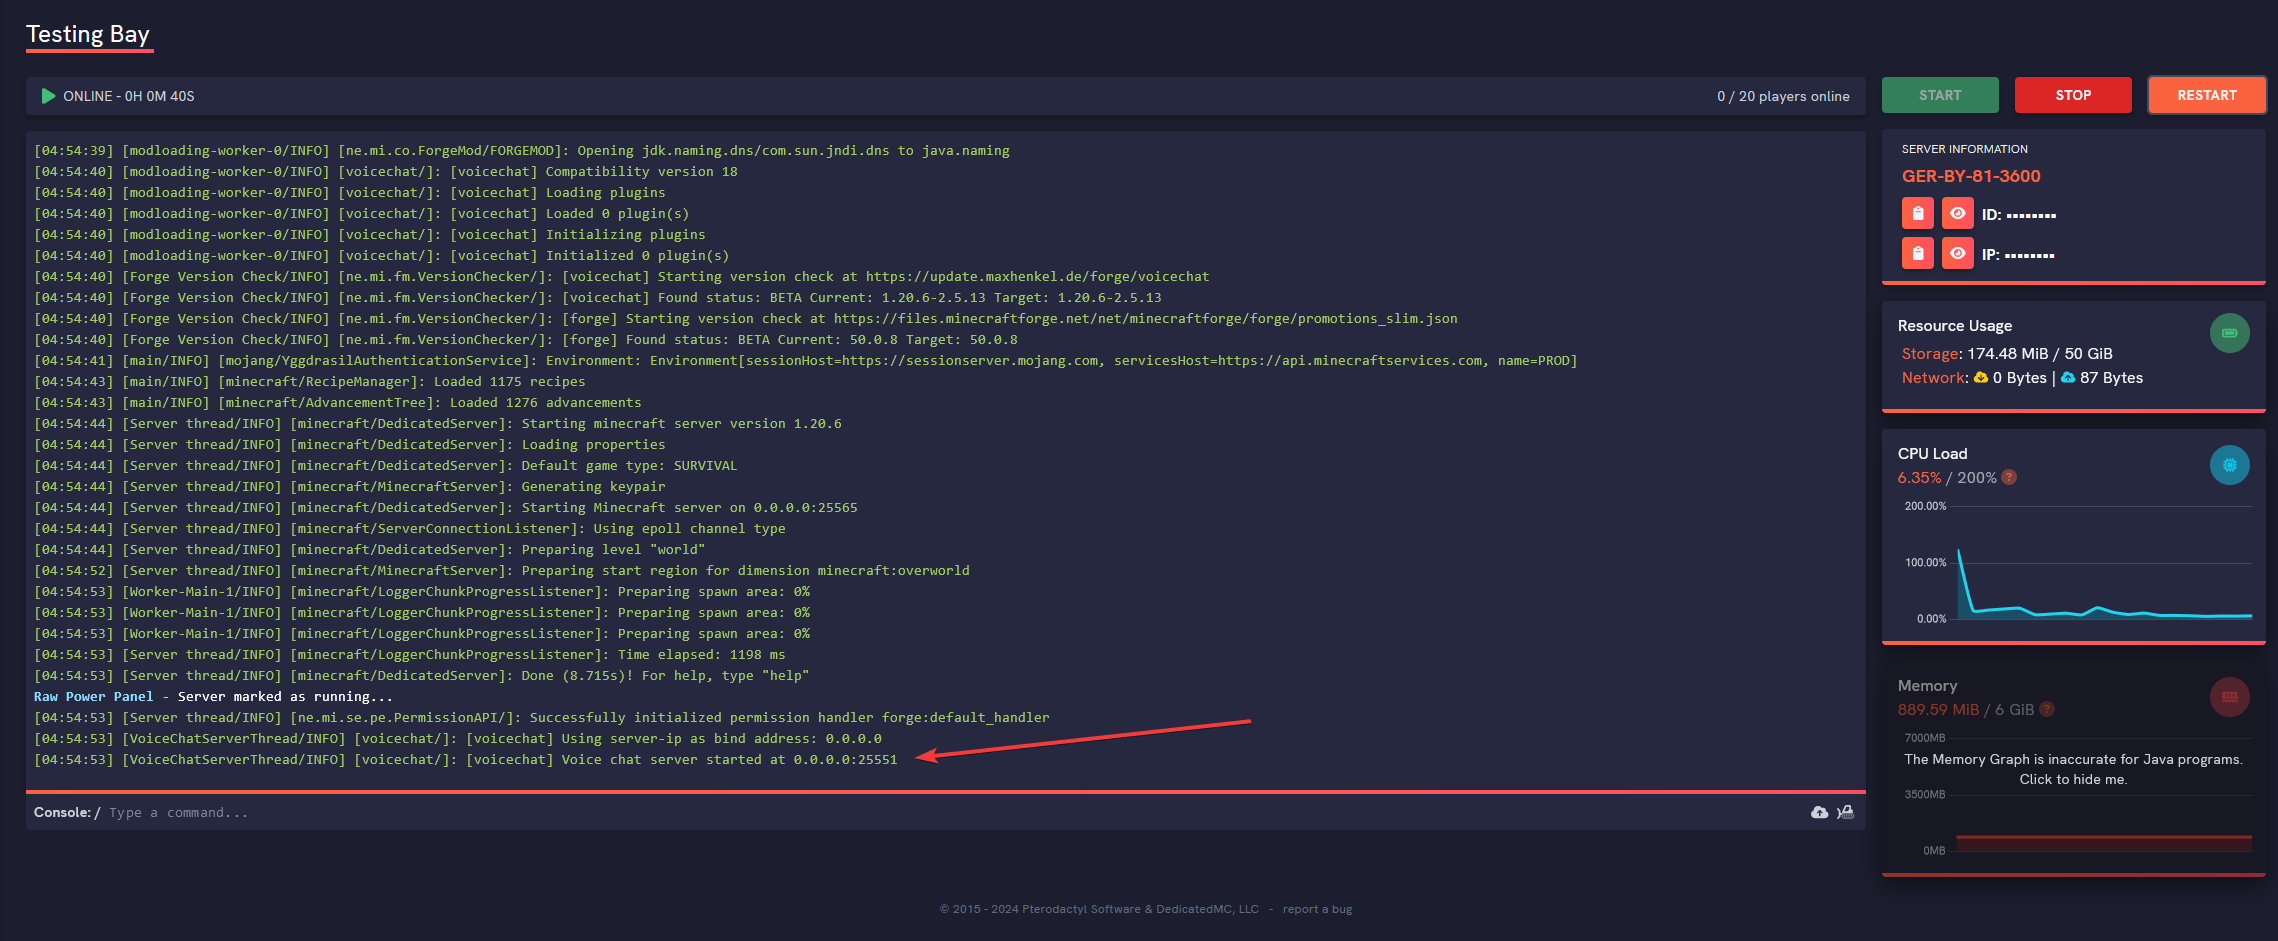
10. Done! You have installed Voice Chat for Forge!